
Disclaimer: This is a personal blog, any views or opinions expressed in this blog are personal and belong solely to the blog author and do not represent those of people, institutions, or organizations that the author may or may not be associated with in a professional or personal capacity, unless explicitly stated. Any views or opinions are not intended to malign any religion, ethnic group, club, organization, company, or individual.
This post is part of our series on how to Create a Multi-Tier Auto-Scaling WordPress Site on Amazon Web Services. If you haven’t checked out our previous posts, be sure to click the link above.
As a reminder, we’ll follow the AWS Reference architecture as close as possible; however, we will try to use Free Tier resources whenever available. For this tutorial, we are going to create a file system that we’ll mount to our WordPress servers. This allows all the WordPress files to be shared as we scale up.
Note: There are performance implications of using EFS that we won’t get into here. However, by using caching properly, as well as a Content Delivery Network (CDN), we shouldn’t see much negative impact.
Scalability does come with some drawbacks with regard to keeping themes/plugins up to date; however, it all depends on your goal and what you need for your site. The way you’ve traditionally managed WordPress will be different with this architecture and that needs to be taken into account long-term.
Please note that we are going to put the whole WordPress installation on EFS which does have some latency and performance concerns. We will try to overcome this with caching and CDN; however, if that’s not performant enough for your use case, you may want to only put the “uploads” directory on EFS and then have a process to update the base AMI going forward.
Prerequisite: AWS Reference Architecture and Previous Posts
As mentioned above, please ensure that you check out the AWS Reference architecture as well as our previous posts.
Once you are logged into your AWS Management Console, navigate to the “EFS” Service.

Create File System
Click on “Create file system” on the right hand side.

Type in a friendly name and then make sure to select the VPC that you created earlier.

Then click on “Customize”.
File System Settings
On this page, you can select the options that you would like for your file system. For performance, we are selecting “General Purpose” and throughput, we are using “Bursting.” Although the other options will give better performance and higher I/O, they incur additional costs. Lastly, we will uncheck “Enable encryption of data at rest”

Network Settings
We will have to change settings on this page.
- Ensure that your VPC is selected
- Delete the subnets where you don’t necessarily need access, in our example, we will remove our “Data” tier subnets which are in 1e and 1f
- Select your Security Group specific to EFS that we created earlier in our series

Click on “Next”.
File System Policy
We will leave everything as is.

Click on “Next”. If everything looks good on your review page, go ahead and click on “Create” at the bottom right.
Important Details
Make sure to note your file system ID as we’ll need this later.
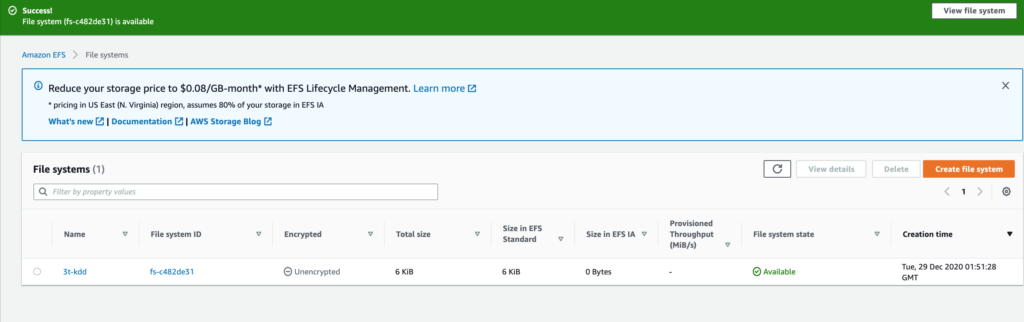
Now our EFS File System is created and usable.
We’ll go over how to mount the file system in our posts on Bastion hosts and the OpenLiteSpeed WordPress server; however, below are the details you’ll need to get started.
Mount the File System
Install NFS Common Package for Ubuntu
Since we are using Ubuntu, we are going to install the nfs-common package with the following command:
sudo apt-get install nfs-common -yInstall CacheFileSD Package for Ubuntu
We are also going to install cachefilesd
sudo apt-get install cachefilesd -yConfigure CacheFileSD
With a user with proper permissions, edit /etc/default/cachefilesd and uncomment the line RUN=yes (remove the #).

Start CacheFileSD
Then start the service with the following command:
sudo /etc/init.d/cachefilesd start
You can also check the status of the service with the following:
service cachefilesd status
Determine File System DNS
Next, you’ll need to determine your File System DNS name; the nomenclature is as follows:
file-system-id.efs.aws-region.amazonaws.comTherefore, our DNS Name would be
fs-c482de31.efs.us-east-1.amazonaws.comMount File System Command
Next, we are going to mount the EFS file system to a directory we create, and ensure that it uses cachefiles.
Important: the fsc option is what tells the system to use cachefilesd. This is not noted in the AWS Documentation.
cd #takes us to our home directory
sudo mkdir /efs
sudo mount -t nfs4 -o nfsvers=4.1,rsize=1048576,wsize=1048576,hard,timeo=600,retrans=2,fsc fs-c482de31.efs.us-east-1.amazonaws.com:/ /efs
sudo service cachefilesd restart  #to ensure that cachefilesd knows about our new mount
Note: If you have issues with using the DNS name to mount your File system, ensure your VPC has DNS Hostnames and DNS Resolution Enabled. It may take a few minutes to reflect.

Verify that our EFS Mount is working with CacheFileSD
Navigate to the caching directory which is typically /var/cache/fscache, and then list the files. If you see two directories, you are all set.

You can also check stats with the following command:
cat /proc/fs/fscache/statsMount File System On Startup
To ensure that our file system is mounted on start-up, we’ll edit the fstab file.
sudo vi /etc/fstab
fs-c482de31.efs.us-east-1.amazonaws.com:/ /efs nfs4 nfsvers=4.1,rsize=1048576,wsize=1048576,hard,timeo=600,retrans=2,fsc,_netdev 0 0

Reboot Server and Ensure Mount is still Present
Go ahead and reboot your server and then run df -h to make sure that your mount is still present.

Now your EFS Mount is all set!
I don’t understand what the Mount the File System section means, and why are you jumping into cli configuration all of a sudden and where should I do it?
Hi Ahnaf,
Thank you for your comment/question. The “Mount the File System” section is about attaching our EFS to our Ubuntu server and ensuring that it stays attached even after reboot. For performance concerns, we also install some additional packages such as CacheFileSD. Is there any particular area that is confusing or needs more clarification? Here is the AWS Doc page as well if it helps: https://docs.aws.amazon.com/efs/latest/ug/wt1-test.html
Good luck!
Raz